
Set up your mod
Add TeaKit to a Gradle project and run your first test.
Start with a mod project whose development client already launches successfully. TeaKit will use that same client with an extra development-only mod and a directory of tests.
You need a JDK that can run your project and TeaKit's test runner. The runner requires Java 21 or newer; use a newer JDK when your Minecraft development setup requires it. You do not need a JavaScript package manager or a separate Node installation.
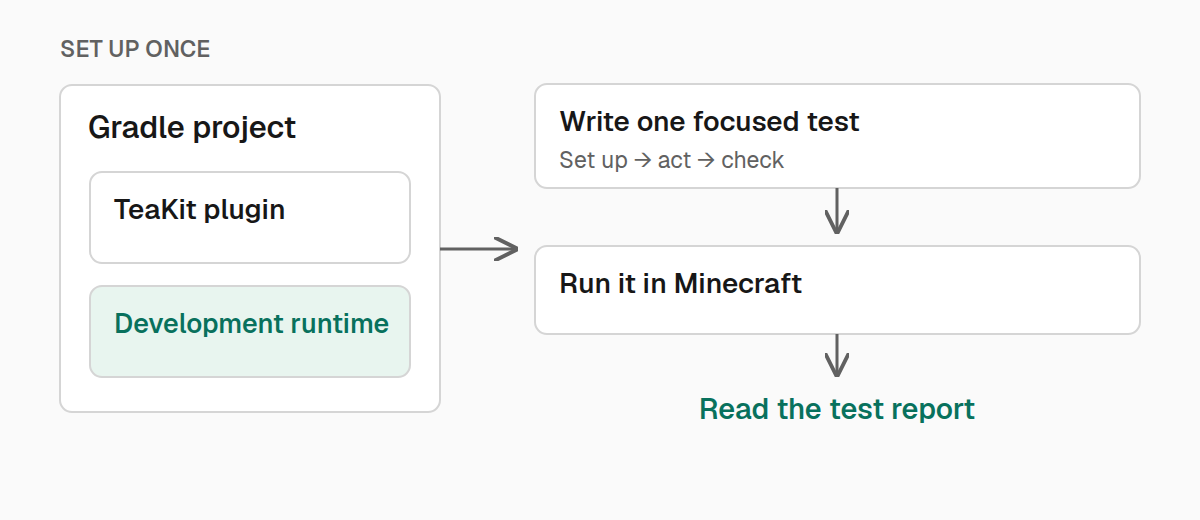
Add the Gradle plugin
Choose a TeaKit release from Kaf Maven. Add a teakitVersion property to gradle.properties containing that release number.
In settings.gradle.kts, add TeaKit's repository and plugin to your existing pluginManagement block:
pluginManagement {
    val teakitVersion: String by settings

    repositories {
        maven("https://maven.kaf.sh")
        gradlePluginPortal()
        // Keep your loader's existing plugin repositories here too.
    }
    plugins {
        id("com.iamkaf.teakit") version teakitVersion
    }
}
Apply the plugin in the Gradle project that owns your client run:
plugins {
    id("com.iamkaf.teakit")
}

teakit {
    testDirectories.add("test/teakit")
    timeoutSeconds.set(240)
}
Add TeaKit to development runs
The test tools need TeaKit installed in the game they control. Add the artifact for your loader to a local runtime configuration. The plugin already adds the Maven repository for these dependencies.
The examples below use your teakitVersion property and a minecraftVersion property containing the project's Minecraft version. If your build calls that property something else, use its existing name.
For Fabric Loom:
val teakitVersion: String by project
val minecraftVersion: String by project

dependencies {
    add("modLocalRuntime", "com.iamkaf.teakit:teakit-fabric:$teakitVersion+$minecraftVersion")
}
For NeoForge ModDevGradle, use localRuntime and teakit-neoforge instead. For ForgeGradle, use runtimeOnly and teakit-forge, following your project's dependency remapping rules. Add only the artifact for that loader, and keep TeaKit out of your published mod's required dependencies.
Tell TeaKit what to launch
A node is one Minecraft-and-loader combination in your project. Create teakit.toml next to the Gradle wrapper, replacing YOUR_MINECRAFT_VERSION with the project's Minecraft version and examplemod with your mod ID:
modId = "examplemod"

[nodes."YOUR_MINECRAFT_VERSION-fabric"]
Use forge or neoforge in the node name for those loaders. A normal single-loader project uses runClient and the run game directory by default. For a multiloader project or a custom launch task, see launch configuration.
Initialize the test tools and editor types:
./gradlew teakitInit
./gradlew teakitDoctor
teakitInit creates the optional teakitw wrapper and installs the @teakit/test declarations. Keep the generated tsconfig.json integration so your editor can resolve the imports. On Windows, use gradlew.bat and teakitw.bat.
Write a first test
Create test/teakit/loaded.test.ts. Replace examplemod with your mod ID:
import { Capability, Readiness, expect, test } from "@teakit/test";

test("loads the mod", {
  capabilities: [Capability.RuntimeMods],
  readiness: [Readiness.Title],
  timeout: "10s",
}, async ({ runtime }) => {
  expect(await runtime.mods.isLoaded("examplemod")).toBe(true);
});
This checks that the game running the test actually loaded your mod. Capability.RuntimeMods declares the operation the test needs; Readiness.Title lets it run once the client has reached the title screen.
Run it
Check the test before starting Minecraft:
./gradlew teakitTypecheck
./teakitw nodes
Copy one node name from that list and replace YOUR_NODE below:
./gradlew teakitRun -Pteakit.node=YOUR_NODE -Pteakit.testFile=test/teakit/loaded.test.tsMinecraft opens, TeaKit runs the test, and the client closes when the run finishes. The terminal reports the result and the directory containing its logs and summary.
A passing setup check is the starting point. Next, write a test for something your mod does, such as giving an item, opening a menu, or changing a block.