
Screens and rendering
Interact with menus, press keys, and check what the player can see.
A screen test should exercise the same action as a player, then check its result. TeaKit lets you find buttons by their labels and menu slots by their contents, so tests do not need to guess where a control appears on screen.
Start with a visible client and a loaded world, as described in Getting started.
Move an item through the inventory
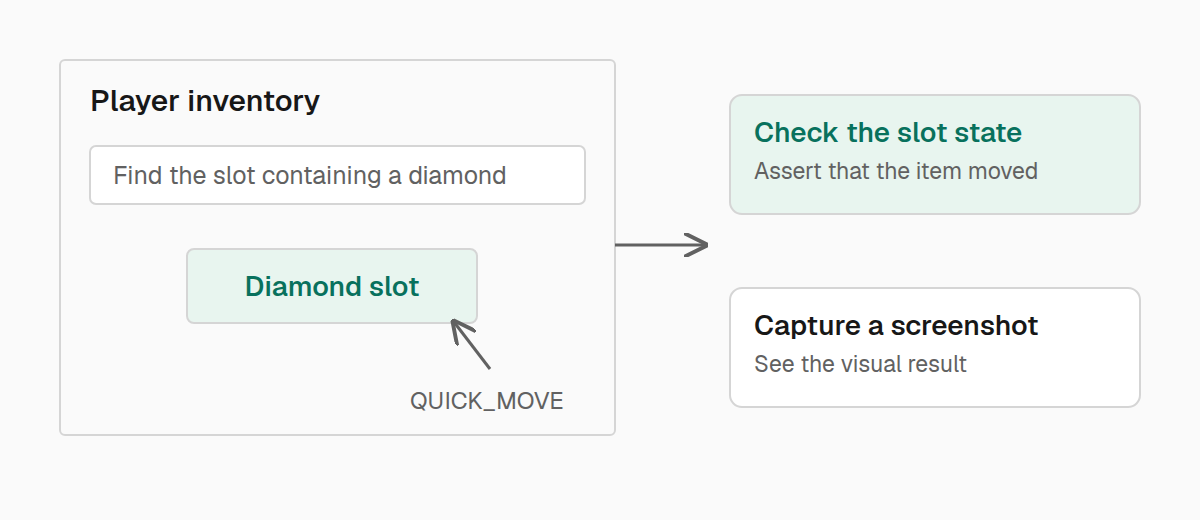
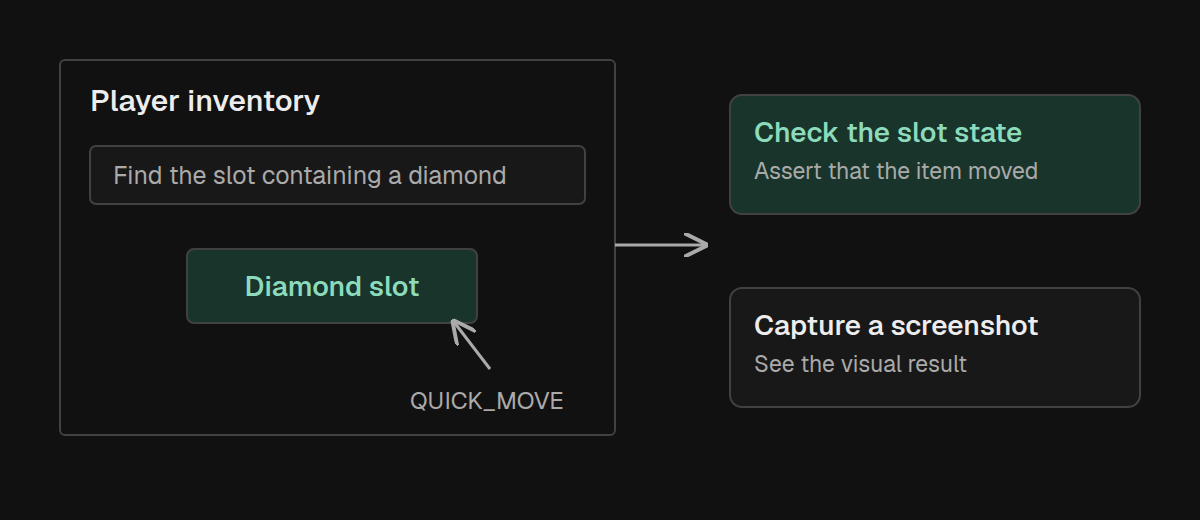
This test gives the player a diamond, opens their inventory, and shift-clicks its slot. It then checks that the diamond moved to a different slot. This exercises the menu action, rather than changing the inventory directly for the assertion.
import { Readiness, describe, expect, test } from "@teakit/test";

describe.configure({ readiness: [Readiness.World, Readiness.Player] });

test("shift-click moves an item between inventory sections", async ({
  client, player, artifacts,
}) => {
  await player.reset({ gameMode: "survival", inventory: "clear" });
  await player.give("minecraft:diamond");
  await client.openInventory();

  await expect(async () => {
    const screen = await client.screen();
    return screen.menu().slots().some(
      (slot) => slot.item?.itemId === "minecraft:diamond",
    );
  }).toEventuallyEqual(true, { timeout: "5s" });

  const screen = await client.screen();
  const diamond = screen.menu().slots().find(
    (slot) => slot.item?.itemId === "minecraft:diamond",
  );
  if (!diamond) throw new Error("The diamond is missing from the open menu");

  await screen.menu().slot(diamond.slot).click({ clickType: "QUICK_MOVE" });

  await expect(async () => {
    const current = await client.screen();
    return current.menu().slots().some(
      (slot) => slot.item?.itemId === "minecraft:diamond"
        && slot.slot !== diamond.slot,
    );
  }).toEventuallyEqual(true, { timeout: "5s" });

  await artifacts.attachScreenshot(await client.screenshot("moved-diamond"));
  await client.closeMenus();
});
menu().slots() describes the open menu's slots. A menu slot number is not necessarily the same as a player's inventory slot number. Each menu item snapshot exposes its registry identifier as itemId. Finding a slot by that item avoids depending on the layout.
A screen snapshot describes one moment. Read client.screen() again after an action when you want to inspect the result. The polling function above does this on every attempt, allowing time for the client to receive the inventory update.
Activate a button
Use screen.widgets().activate() for a labeled button. Suppose your mod opens a settings screen with R and provides a Done button. This test opens that screen, activates Done, and checks that the player is back in the game. Replace the key and label with your screen's controls:
import { Readiness, describe, expect, test } from "@teakit/test";

describe.configure({ readiness: [Readiness.World, Readiness.Player] });

test("the settings screen returns to the game", async ({ client }) => {
  await client.closeMenus();
  await client.key(82); // R, using GLFW's key code.

  await expect(async () => {
    const screen = await client.screen();
    return screen.widgets().all().some(
      (widget) => widget.label === "Done" && widget.active,
    );
  }).toEventuallyEqual(true, { timeout: "5s" });

  const settings = await client.screen();
  await settings.widgets().activate("Done");
  const hud = await client.waitForScreen("hud");
  expect(hud.open).toBe(false);
});
The label is the displayed, translated text. This example assumes an English client. Use the label shown by your test client's language setting, or select a widget with { widgetClass: "...", nth: 0 } when its class is the more stable identifier. Inspect widgets().all() to see the available controls.
For a scrollable list, screen.lists().entries() shows the entries and screen.lists().entry("label").activate() selects one. Prefer these handles to absolute mouse coordinates: they continue to work when the window size or GUI scale changes.
Test input and chat
client.key() presses and releases a GLFW key by default. For a held key, call client.keyState(key, true) and release it with client.keyState(key, false) in a finally block. That keeps a failed assertion from leaving movement or another action held down.
Use client.chat("Hello") to send an ordinary chat message through the client's signed chat path. Use client.command("examplemod reward") for a command; do not pass a slash-prefixed command to chat().
Neither call proves that another player saw a message or that the server applied a command. Assert the resulting game state, as shown in Multiplayer tests.
Check a block's model and texture
A block can exist on the server while rendering incorrectly on the client. Set up the block, wait for the client to see it, then use a render probe to check its assets:
import { Readiness, describe, expect, pos, test } from "@teakit/test";

describe.configure({ readiness: [Readiness.World, Readiness.Player] });

test("the display block has a model and texture", async ({
  world, player, client, render, artifacts,
}) => {
  const display = pos(0, 100, 0);
  const viewpoint = pos(3, 100, 3);
  await world.ensureWalkable(viewpoint);
  await player.teleport(viewpoint);
  await world.setBlock(display, "minecraft:diamond_block");
  await client.closeMenus();
  await client.lookAt(display);

  const block = render.block(display);
  await expect(async () => (await block.inspect()).id)
    .toEventuallyEqual("minecraft:diamond_block", { timeout: "5s" });
  await expect(block).toHaveModel();
  await expect(block).toHaveTexture();

  await client.waitForFrames(2);
  await artifacts.attachScreenshot(await client.screenshot("display-block"));
});
Replace the vanilla block with your mod's registered block to check its assets. toHaveModel() and toHaveTexture() check that assets resolve; they do not compare the result with a reference image. Keep the screenshot for reviewing shape, lighting, and placement.
For a useful comparison, fix the viewpoint, time, and weather in the test. Wait for the state you care about before waiting for a few rendered frames. A frame wait alone does not establish that a server update has arrived.