
HUDs, keys, and tooltips
Add a help key, draw a small HUD, and show useful tooltips.
Amber's client helpers cover small pieces of interface work: registering a key, drawing text, and building tooltips. Let's use them to add a help display that the player can toggle with H.
Keep this code in a client-only class and call it from your client initialization. Classes such as Minecraft and KeyMapping must not be loaded on a dedicated server.
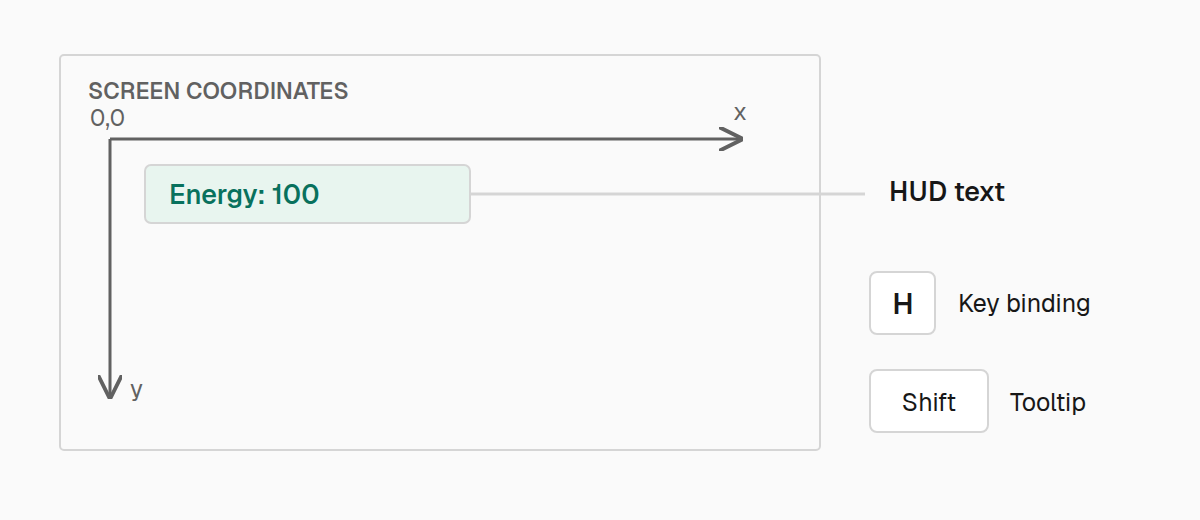
Add a help key and HUD
Register the key once, listen for presses during client ticks, and draw the help text only while the display is enabled:
import com.iamkaf.amber.api.event.v1.events.common.client.ClientTickEvents;
import com.iamkaf.amber.api.event.v1.events.common.client.HudEvents;
import com.iamkaf.amber.api.functions.v1.ClientFunctions;
import com.iamkaf.amber.api.registry.v1.KeybindHelper;
import net.minecraft.client.KeyMapping;
import net.minecraft.client.Minecraft;
import net.minecraft.network.chat.Component;
import net.minecraft.resources.Identifier;
import org.lwjgl.glfw.GLFW;

public final class HelpHud {
    private static boolean visible;

    public static void initialize() {
        var category = KeyMapping.Category.register(
                Identifier.fromNamespaceAndPath("example", "controls"));
        var helpKey = KeybindHelper.register(new KeyMapping(
                "key.example.help", GLFW.GLFW_KEY_H, category));

        ClientTickEvents.END_CLIENT_TICK.register(() -> {
            var client = Minecraft.getInstance();
            while (helpKey.consumeClick()) {
                if (client.player != null && client.gui.screen() == null) {
                    visible = !visible;
                }
            }
        });

        HudEvents.RENDER_HUD.register((graphics, tickCounter) -> {
            if (!visible || !ClientFunctions.shouldRenderHud()) {
                return;
            }

            var writer = new ClientFunctions.TextWriter(
                    graphics, Minecraft.getInstance().font, 8, 8);
            writer.writeLine(Component.translatable("example.help.title"));
            writer.writeLine(Component.translatable("example.help.body"), 0xFFAAAAAA);
        });
    }
}
Replace example with your mod ID. In your source language file, give the key, category, and help text readable names:
{
  "key.example.help": "Toggle help",
  "key.category.example.controls": "My Mod",
  "example.help.title": "Help",
  "example.help.body": "Use the guide item to choose a destination."
}
The key appears in Minecraft's Controls screen, where players can rebind it. KeybindHelper.register returns the mapping you passed in; it does not decide what pressing it should do.
consumeClick() consumes a queued press. The loop handles each press once, making it suitable for a toggle. Use isDown() instead when an action should continue while a key is held. The screen check keeps this toggle from firing while another interface is open.
Register mappings during client initialization, before the loader's key registration event, and register each custom category only once. Avoid registering keys inside tick callbacks or when opening a screen.
Make the HUD respect the game
ClientFunctions.shouldRenderHud() hides the example when the player hides the GUI, opens the debug overlay, or is not in a world with a player. Your feature's own visibility check belongs alongside it, as visible does above.
The HUD callback receives the graphics context for the current frame. Create the TextWriter inside that callback rather than keeping one between frames. HudEvents.RENDER_HUD runs after the in-game HUD and does not run on the loading screen.
TextWriter starts its cursor at the position you supply. Each writeLine draws a component and moves down by the font's line height. It does not wrap long text, so keep a small HUD concise or handle wrapping in a custom screen.
For a single label, you can draw directly:
ClientFunctions.renderText(graphics, Minecraft.getInstance().font,
        Component.literal("Ready"), 8, 8, 0xFFFFFFFF);
Colors use 0xAARRGGBB: the first byte is opacity. 0xFFFFFFFF is opaque white, 0xFFAAAAAA is opaque gray, and 0xFF000000 is opaque black. ClientFunctions.WHITE is available when you want the default white explicitly.
If a label needs a fixed position within a longer text block, use writer.write(message, x, y, color). That moves the cursor to the given coordinates but does not advance it after drawing. Consecutive write calls at the same coordinates overlap; use writeLine when you want another line.
Put extra detail behind Shift
Suppose the guide item needs a short summary and a longer explanation. Build its tooltip when Minecraft asks for it, so the held-key state is checked each time:
new ClientFunctions.SmartTooltip()
        .add(Component.translatable("example.guide.summary"))
        .add(Component.translatable("example.guide.hint"))
        .shift(Component.translatable("example.guide.details"))
        .into(tooltip::add);
Here, tooltip is the component list from your item's tooltip callback. The summary and hint always appear; the details appear while Shift is held. Add the translations to your source language file, including a hint such as “Hold Shift for details.” Amber does not add that prompt automatically.
For a configurable key instead of Shift, use .keybind(mapping, component). .shiftKeybind(mapping, component) requires both. The builder checks the keys as each method runs, so do not cache a completed SmartTooltip across frames.
into appends the collected lines in order. It also accepts a Consumer<Component> directly if that is what your callback provides. It does not clear the builder after emitting its lines.
Show an item tooltip in a custom screen
If your screen displays an item icon, draw its tooltip when the pointer is over that icon:
ClientFunctions.renderTooltip(graphics, stack, mouseX, mouseY);Call this from the screen's render flow with its current graphics context and mouse coordinates. The helper uses the item's normal tooltip text, tooltip style, and default positioning. It ignores a null or empty stack. Your screen still decides which icon is hovered and when to show the tooltip.
Offer the same help through a command
A local command gives players another way to find your help text. Register this listener during client initialization:
import com.iamkaf.amber.api.event.v1.events.common.client.ClientCommandEvents;
import com.mojang.brigadier.Command;
import com.mojang.brigadier.builder.LiteralArgumentBuilder;
import net.minecraft.client.Minecraft;
import net.minecraft.commands.CommandSourceStack;
import net.minecraft.network.chat.Component;

ClientCommandEvents.EVENT.register((dispatcher, registryAccess) -> {
    dispatcher.register(LiteralArgumentBuilder.<CommandSourceStack>literal("example_help")
            .executes(context -> {
                var player = Minecraft.getInstance().player;
                if (player != null) {
                    player.sendSystemMessage(Component.translatable("example.help.body"));
                }
                return Command.SINGLE_SUCCESS;
            }));
});
This command only displays local help. It gets the player from Minecraft and does not access the Brigadier command source. Keep that distinction for client commands: the source's concrete type belongs to the loader. Do not use server command-source methods or treat a local command as authority to change server gameplay.
For a command that runs on the server, register through CommandEvents instead. SimpleCommands.createBaseCommand gives you a root command that prints your mod's installed name and version:
import com.iamkaf.amber.api.commands.v1.SimpleCommands;
import com.iamkaf.amber.api.event.v1.events.common.CommandEvents;

CommandEvents.EVENT.register((dispatcher, registryAccess, environment) -> {
    dispatcher.register(SimpleCommands.createBaseCommand("example"));
});
Use your actual mod ID so Amber can find its metadata. The helper returns a normal Brigadier builder: add .then(...) subcommands and any .requires(...) permission checks your command needs. It does not add permission checks for you. Keep this server command in common initialization, separate from the client-only help display.
Continue with events to connect other client or gameplay behavior to Amber callbacks.